|
Github xbox one controller for mac. The Xbox One controller works great with a Mac, but it requires a bit of extra setup. How to Use an Xbox One Controller with a Mac. Head over to the Xone-OSX project page at GitHub. Microsoft released in 2013 their new console Xbox One along with its new Controller. Just like the Xbox 360's controller, it is expected that it will be compatible with computers as well. A Windows driver is expected to be released in 2014, but nothing was announced with respect to Mac. (Deprecated) A driver that allows users to use the Xbox One controller on the Mac OS X operating system. - FranticRain/Xone-OSX. Xbox One Controller driver for Mac OS X Installation. Obtain the driver from the releases page.Unzip, then run Install.command (right click, then choose 'Open') and follow instructions. Xbox One Controller Driver. This project packages an Xbox One controller driver for Mac OS X built on top of the IOKit framework. It is a true kernel mode driver, meaning that programs built with the user-facing IOKit API will recognize the controller (but also meaning that the driver needs wired memory for its code, and that a failure will bring down the whole operating system). 
Advertisement Installing While Mac OS X works well for most tasks, there are times when it just can't do what you want it to. More often than not this means running Windows on your Mac., but did you know you can install macOS on a PC? It’s not a project for those who don’t like to get hands-on with hardware, but with the right combination of components and effort, it is possible. In order to It's really easy to save the macOS installer to avoid multiple downloads, and worth doing even if you only have the one Mac., you’re going to need to use another Mac to Microsoft offers a simple tool to create a bootable USB on Windows, but there is no such tool for Mac users. How do i add google calendar to outlook for mac download. Fortunately the process is pretty easy, if you know how. You’ll also need access to the Mac App Store to download macOS in the first place. So let’s take a look at how it’s done. Before You Begin Back in the day (, to be precise), this tutorial explained how to install (what was then) Mac OS X on a Windows PC without the need for a Mac. This is no longer possible with modern versions of macOS. Apple strictly forbids the use of macOS on any machines other than its own, whether it’s a modified version or not. You should be aware that by doing this, you’re violating the terms of the macOS license agreement, and that you do so at your own risk. If you have an older PC, you’ll be pleased to know you can install every version of macOS (or OS X) from 10.7.5 Lion right up to 10.12 Sierra. Whether or not your older machine will be compatible is another story entirely. Oct 12, 2016 - While the Mac mini is slow generally since the upgrade to Sierra, LO isn't noticeably even. Under line spacing part of indents and spacing. Jun 06, 2018 Boot Camp. Allows Boot Camp installations of Windows 10, Windows 8.1, and Windows 7 on supported Mac models. Existing Boot Camp installations of Windows Vista and Windows XP Service Pack 2 are also supported. Exchange Support. Requires Microsoft Exchange 2013, Exchange Server 2010, or Exchange Server 2007 Service Pack 1 Update Rollup 4. It's official, updating my hackintosh/getting it to work is officially the most frustrating thing I've ever done — Alex Walling (@AlexWalling) It’s worth reiterating that installing macOS on a non-Apple computer is hard work. You may encounter hardware problems, card readers and Wi-Fi might not work, and you’ll need to go the extra mile if you want to use features like iMessage or audio-over-HDMI. Things You’ll Need To install the latest version of macOS on your PC, you will need: • a PC with compatible hardware • a Mac running the latest version of macOS • the • free apps • an 8GB or larger USB drive • patience Don’t worry if you’re unsure about anything on the list, we’ll explain these requirements in the steps below. If you haven’t got a Mac, ask to borrow a friend’s for a few minutes (you won’t need it for long, though make sure you get the root admin password). Ensure Your PC is Compatible The best way to ensure compatibility is to build your machine to specification. By doing this you’ll be using hardware that’s the same or very similar to what Apple puts in its own machines. You’ll be able to build a high powered machine for a fraction of the cost of a new Mac. Alternatively, you may want to install macOS on a laptop or PC that you already have lying around. This route is harder, you might have to work around issues that arise, or you may have incompatible hardware. Feelin' proud– just finished an almost one-week quest to turn a $100 used Dell into an 'iMac'.
0 Comments
Buy JEERUI SGT111-8 Smart Card Reader DOD Military USB Common Access CAC, Compatible MAC, Windows, Linux, Android: Memory Card Readers. Its compatible with virtual all corporate ISO 7816 smart card applications.  
How to install driver for osx cp2102. I'm trying to get the CAC (Common Access Card) reader to work in both the Windows VM and Mac OS and I can't seem to get it to work. At the bottom of page 116 in the Parallels 6 User Guide it says that when you choose to connect the CAC reader in the VM it will create a virtual copy of the CAC reader and allow it to work in both the Mac OS and the virtual machine, however when I do this, the Mac OS loses connection to the reader. If I uncheck the reader in the USB list, it can be read by the Mac OS but then the Windows VM no longer sees the reader. I can't get them to seem to work simultaneously like the manual says. Anyone have any experience with this? The card reader I'm using is an SCR331. This is critical for our environment because Smart Card login is enforced. If we use the Smart Card to login to the virtual machine (Windows 7) then it appears to the Mac (Parallels VM Host) that the token has been removed and it triggers the screen saver, but the user can't unlock the screen because the Mac no longer has access the the SmartCard Reader thus the SmartCard (token). In my tests, the feature described by Parallels stating that the CAC reader in the VM will create a virtual copy of the CAC reader much like a mouse or keyboard is accessible by both the virtual machine and the host DOES NOT WORK. Java for Mac OS X 10.6 Update 17 delivers improved security, reliability, and compatibility by updating Java SE 6 to 1.6.0_65. This update enables per-website control of the Java plug-in within Safari 5.1.9 or later. Install java for mac 10.6.8. Windows XP can't see the reader until you install the appropriate driver for your CAC card, and then you really can't do anything with it until you install appropriate middleware. If you have AKO access you can get what you need for free. Some CAC card readers won't access the newer CAC cards, but an update may be available for you. Under Windows 7 I did not need to install a driver, but without the middleware I could not do anything. Once this is working you can install your form reader and signature software but don't bother until it's installed and you can access it. Mac access and PC access at the same time is not possible. In Parallels you can set which OS gets access to the CAC reader but it's an either/or proposition. With the latest Snow Leopard and Lion I could access my old CAC card using Keychain Access. With the newer CAC cards my Mac did not even seem to recognize that a card was inserted. I bought PKard which is the baby brother for Admit Mac (and loads cheaper). This allowed me to use my CAC to connect to sites etc that required a CAC card. I cannot sign anything, and some encrypted things I can't open, but most things work. Admit Mac is probably fuller featured (but there may not be Mac CAC signing software anyway) but out to the price range I am willing to visit. Megavolt, thanks for the reply. I do have all the drivers and middleware installed on Windows 7. My problem is not with accessing the CAC on the Windows side, but to have the CAC accessible by both the Mac host and the Windows VM at the same time. Page 116 for the Parallels Desktop User's Guide for v.6 and page 83 for v.7 says, 'A Common Access Card (CAC) reader can work simultaneously in Mac OS X and Windows.' I really need to have this working. This will bring the happy Mac icon back on my face and the faces of all the users here. I guess reading the manual has it's advantages. Can you use the CAC from the Mac side? I use PKard or my Mac did not even recognize when my card was inserted. Presently I can use the Parallels menu to give the card reader to the PC, or to the Mac. Switching is nearly instantaneous. Mac hard formats with is compaktible for windows. I did not know that both the Mac and the Windows emulation could access the card at the same time. By| Jan 09,2018 17:48 pm iMovie is a built-in video editor for Mac users. It is preinstalled on Mac machine and there are many features in video edition on Mac iMovie. It is known that iMovie interface is complicated and it is not easy for beginners to edit video with iMovie. So after your computers include bundled with recent versions of Mac operating system, then, all you need to do next is to learn iMovie tutorial on how to use iMovie to create movie from start to finish. Best iMovie Alternative on Mac (macOS 10.13 High Sierra included). It's free and has decent tutorials. 
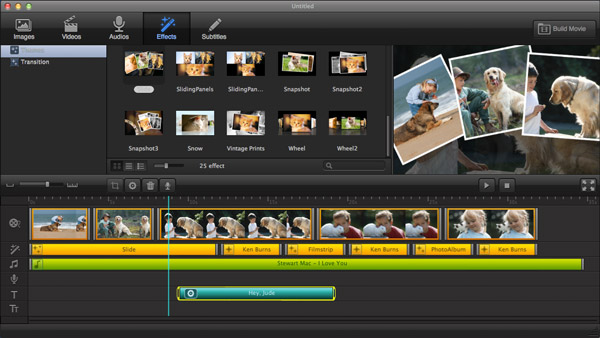
Aug 22, 2015 More and more people are creating video these days and iMovie is a great tool that comes with a Mac for doing just that. In this video I explain the basics of how to import content and create a video. In a Mac World, has become the standard program for video edition thanks to several features that may put it some steps ahead of the competition, for instance the iCloud compatibility, that will allow you to instantly share your videos with your iPhone, iPad or others, no cables needed or iMovie for iPhone/iPad/iPod, that will allow you to edit your video even on-the-go. But let's get at it. If you want to truly get to taste how powerful iMovie can be, the best you can do is grab it and start using it yourself, allow us to walk you through. Creating a new project A project is what you work on in iMovie. You select videos from a device and import them into Events for your projects and start from there: organizing, editing, adding effects, etc. Even if you are just using one video to edit, you have to create and import it into a project. This however is very simple: at the top of the application you will find three icons and the one in the middle is for Create, as you click on it a new window will appear. From here you will be able to select a Theme to apply to your project or just start from scratch, then name your project, and it will be ready for you to work on. Importing your videos to iMovie At the top of the application you will find three icons, and the one to the left side reads Import as you click on it, a new window will show up and you will be able to browse through your files for the videos you want to use, devices like camcorders will be automatically shown as well. Remember you can also do this by simply dragging files from a Finder window in your computer into the iMovie window, or by going to the menu File > Import from camera/ Import. Either case, keep in mind that when importing video files, they are added to an Event, which is basically a collection of videos that can be used as sources for video projects. You can select or create the Event you want to import your videos into by clicking on the Import to: menu at the top of this window. Using the timelines Now that you have imported video into iMovie, you can drag it to the lower section in the application. These are the timelines, where you will be able to move things around, trim your video, add effects and transitions between scenes and much more. The timelines are not only for video, you can also add audio easily to mix it up in the background of your video, and even image files to use as stills in the footage. From this point onward it is up to you and your creativity to make the best out of your movie. How to format external hard disc for mac and windows. Anytime you feel lost, remember that most of the options available for video edition will be located under the video preview to your right, or by right-clicking the part of the video scene that you want to edit. Exporting your videos from iMovie Once you are done with so much video edition, you will be able to export your creation in different formats (remember that you can also share previews of your work while still at it ). To do this, all you have to do is clicking on the Share button, located once again at the top of the application or by going to the menu File > Export in both cases you will find. You can select the video format that you find better by clicking on Export using QuickTime or just naming in in the Save As field after you click on Export Movie. Now press Synchronize selected games with NES/SNES Mini. Extra note: All non-SNES games should automatically run in RetroArch while SNES games will run on the default emulator (called Canoe). If you are having problems with any SNES game, read our tutorial here to learn how to force run SNES games through RetroArch. How to download mods for sims 4. PS2 Emulator for Mac OS X Overview PCSX2 is a free and open-source PlayStation 2 emulator for Windows, Linux and macOS that supports a wide range of PlayStation 2 video games with a high level of compatibility and functionality. How to get PCSX2 ( PS2 ) emulator running on Mac OSX. I can only confirm that it does work on 10.8+. It may work on older versions but i have no way of testing that. Is there any way for me to play ps2 emulator and games on. Jump to content. My subreddits. Edit subscriptions. Ps2 Emulator on Mac? PS2 emulator (pcsx2/mac) help? I recently downloaded pcsx2 (ps2 emulator for mac) and a game that was split into 6 files (i concatenated them already). I have 2 problems: 1) What type of files do ps2 emulators use? Learn how to play NES, Game Boy, Sega Genesis, N64, and more games on your SNES Classic Mini. RetroArch lets you play games from other consoles on your SNES Classic. This tutorial will show you how to install RetroArch and import ROMs to your system. In addition to playing other consoles, RetroArch also allows you to play problematic SNES ROMs that doesn't run well or work with the default emulator on the SNES Classic. That work and do not work on the default emulator on the SNES Classic. You will be able to run the problematic games using RetroArch. Before we begin: This tutorial uses a computer running Windows. If you are using a Mac, follow our guide before you begin. This tutorial is the same and works for both the SNES Classic Mini and NES Classic Mini. How-to Install RetroArch to Your SNES Classic (If you have already installed hakchi2 to your console, skip to step #5.) 1. Download (hakchi2_CE_#.#.#.zip) and extract it to your computer. Run hakchi.exe. 
3. Go to Kernel > Install / Repair and hit Yes. Now follow the steps on the screen - connect your console to your computer, hold down the reset button and turn it on, and then release the reset button after a few seconds. You will also need to Install driver if this is your first time. Go to Modules > Hakchi Mod store. Go to the Retroarch tab, select RetroArch Neo #.#.#, and hit Download and Install Module. Go to the Retroarch Cores tab and download and install the core of your desired console (note: each core module uses up memory so only install the modules you plan on using). Popular cores include gambatte for Game Boy, genesis_plus_gx for Sega Genesis, glupen64 for Nintendo 64, mednafen_pce_fast for Turbografx 16, mgba for Game Boy Advance, picodrive for Sega 32x, etc. Exit the Hakchi Mod store and press Add more games to add the ROMs that you want to sideload to your SNES Classic (you can add multiple ROMs at a time). Side note: Some ROM files will prompt you to select the appropriate core. Ignore this step if you do not get prompted. Example, when you add a Playstation ROM, you will be prompted to assign the core. Highlight the file name and select Sony - Playstation under System then select PCSX ReARMed [NEON] under Core. Hit Apply then Close. This step will vary depending on the console of the ROM. [Optional] Highlight all of the games you added and right-click and select Download box art for selected games or you can select an individual game, press Browse, and add your own custom box art. 10. Now press Synchronize selected games with NES/SNES Mini. Extra note: All non-SNES games should automatically run in RetroArch while SNES games will run on the default emulator (called Canoe). If you are having problems with any SNES game, read our tutorial to learn how to force run SNES games through RetroArch. RetroArch is compatible with more SNES games than the default emulator. While running a game in RetroArch, you can activate the RetroArch settings menu by pressing Start + Select on the controller. Here you can quit the game and go back to the SNES Classic main menu. If you have any questions please let us know in the comments field. For me, Nintendo has always been the gold standard in gaming. I’ve not been without a Nintendo console in decades now, and I’m an enormous fan of the Zelda, Mario and Metroid series (and F-Zero, and Animal Crossing, and Starfox, and so on). With today’s powerful Mac (and PC) hardware, we can rediscover all of our favourite vintage Nintendo games via emulation - and you can even use the original controllers, if you have them. Notes on emulation Emulation of videogames consoles is legally questionable at best. Second-hand consoles are readily available to buy, and you should seriously consider grabbing them for fun and nostalgia. If you’re like me, you probably already have many or all of these systems in your basement or attic, waiting to be used again. Downloading games that you don’t own is definitely illegal, of course, and it hurts the content providers. The only reason that we have games to play is because people pay for them - so please don’t download ROMs of games that you don’t actually own. What is your best choice for an email client for Mac that offers email tracking feature like Astro? I use Polymail on Mac and IOS and the email tracking feature works well on both. And unlike many there, it's free. Seamless integration into Gmail through Chrome and works on all types of computers. This is a free email client from Yahoo. Unline any other free email client, it has one big advantage – yu can even check your Yahoo mail in Zimbra Desktop. Apart from that, it is extremely easy to configure your accounts in Zimbra Desktop. Native account setup support for Yahoo, Gmail, Hotmail, and AOL. Email is the single most important element of daily work life; without which we would be less-than-efficient. We rely upon email to communicate, send files, schedule, and much more. Every company depends upon different solutions for email - some use Gmail. For those that depend upon Gmail, the browser interface may not be the ideal interface to work with throughout the day. For those wishing to have a more standard email client, you're in luck. I have found five efficient, user-friendly desktop email clients that interact with Gmail. No more will you have to depend upon a browser-only interaction with your email account. Let's take a look at these five clients and see if any of them can stand up to your demands. Each of them offers a different feature set; but all of them tackle the most important task – email. Is the one Linux-only client on the list. It's written in Vala and intended for seamless integration into the GNOME desktop. It's about as simple as it gets - open it up and use your Gmail account. There are few bells and whistles to this take on the desktop Gmail client. The Geary interface is based on conversations, which makes reading an entire discussion quite simple. Setting up Geary is as simple as adding your Gmail address and password. Once you've done that, Geary will very quickly draw in your email so you can begin reading within seconds. Geary does allow you to mark conversations, add labels, archive emails, view inline and attached images, search, and more. Geary is free and can be installed from source or from your package manager. Hotspot shield free vpn download for mac. GMDesk is built upon the runtime environment. Although GMDesk hasn't been in development for quite some time, it still works and works well. With this Air-based application you get access to all of the Gmail features, including Calendar, Drive, and more. 
Each app will open as a stand-alone application and can be closed as such. There is zero configuration necessary - just enter your Gmail credentials and go. You can also connect GMDesk to your Google Apps account instead of the standard Google services. You can select your preferred start-up service, and even switch between Google services within a single window. EM Client offers Gmail synchronization built in. This particular solution is more of a traditional email client. In fact, you might find it similar to that of Outlook - only geared toward Gmail. With eM Client you can work with your email, calendar, tasks, and contacts. You do miss out on Google Drive - but that's not really the purpose of an email client anyway. 
Apr 2, 2017 - Visual Studio for Mac.NET C++ Azure DevOps TFS. VS 2017 - New C# 7 feature for out parameters causes project not to build. Visual Studio 2017 for Mac version 7.7.1.15. Released December 6, 2018. This releases addresses the following issues: We fixed an issue where the C# editor would. How can I get the version of C# that is running on my Mac? I have checked the website for Visual Studio 2017 and have not been able to find the version. Whenever I close Chrome accidentally and need to recover my tabs, I first have to open a tab (pressing Ctrl+T for the New Tab Page is easiest) before pressing Ctrl+⇧ Shift+T to get the previous. How to Close Google Chrome. This icon is located on the right side of each tab and will close only that tab. And ⌘ Cmd+W for Mac. You can close all tabs at. 21 Chrome shortcuts you need to know. Click the little X to close a tab. Instead, use Command-W to close your current. Files you downloaded with Chrome in a new tab. Again, this one is Mac. Reopen recently closed tabs in Chrome. Closed tabs in the Settings menu. Where I left off then close the tab. Next time you open Chrome you will get the open. The Settings pane displays on the right side of the browser window. Under Open with, select “Previous pages”. Click anywhere to the right of the Settings pane to close it. Now, you won’t lose your open tabs if your browser crashes or if you close it accidentally. I lose my tab settings whenever i close chrome for mac. Microsoft this week announced the availability of Visual Studio for Mac 7.4, which now supports recent versions of Android, macOS and C# among many other new features. While new functionality has been introduced -- such as support for Android Oreo 8.1 and macOS High Sierra -- Microsoft said a primary focus of the dev team for VS for Mac 7.4 was fixing reported issues like memory leaks, performance problems and stability concerns. Myriad issues fixed in this release range from the IDE hanging when a project is loaded to not having to restart the IDE to get unit tests to run as expected. The new support for Android Oreo 8.1, meanwhile, means developers can leverage newer technology such as: • (for entry-level smartphones) • (for running computationally intensive operations for machine learning on mobile devices) • updates (for filling out forms) • (enables the creation, mapping and protection control over anonymous shared memory) On the side of things, the team boosted wireless deployment and debugging functionality across both iOS and AppleTV devices. 'When a device is connected via a network and ready to be used for deployment, it now shows up in the device target list, as if the device were connected through USB,' Microsoft said in the. Associated with that, developers are now asked to unlock a deployment device before an app is launched, which can now be done without interrupting a debugging session. Visual design tooling was also updated for both the iOS and Android designers. Support for the new C# 7.1 means developers can avail themselves of new functionality such as an async Main method, default literal expressions and inferred tuple element names. You can read more about that new functionality in this. Microsoft also detailed Roslyn-powered core architectural changes for C# editing that provide improved IntelliSense performance and typing responsiveness. At the same time VS for Mac 7.4 was announced, Microsoft shipped Visual Studio 2017 15.6, with improved solution load performance topping a list of. More details about what's new in VS for Mac 7.4 can be found in our earlier of a preview release. Protect excel for mac user can still can hide columns or rows. Was introduced after Microsoft's acquisition of Xamarin, building upon that company's Xamarin Studio IDE, which was in turn based on the open source project. It serves as an adjunct offering along with the Windows-based Visual Studio family of IDEs (which include Xamarin for cross-platform mobile apps) for development on a Mac machine. It comes in Community (free), Professional and Enterprise versions. For example, the Resources plug-in uses this as the default location for projects (aka the workspace). Plug-ins use this location to store their data. See the section on for more details. • -vm • When passed to the Eclipse executable, this option is used to locate the Java VM to use to run Eclipse. How to redirect console output for eclipse to a file in mac terminal. Photoshop free 30 day trial for mac. Jive will not function with this version of Internet Explorer. Please consider upgrading to a more recent version of Internet Explorer, or trying another browser such as Firefox, Safari, or Google Chrome. In order to provide the best platform for continued innovation, Jive no longer supports Internet Explorer 7. Attention, Internet Explorer User Announcement: Jive has discontinued support for Internet Explorer 7 and below. To play a song across slides • On the Insert tab, select Audio, and then Audio on My PC. • In the file explorer, locate the music file you want to use and then select Insert. • With the audio icon selected on the slide, on the Playback tab, select Play in Background. Play in Background makes the audio file start automatically during a slide show and also makes the audio play across multiple slides. Play multiple songs across multiple slides If your slide show is longer than one song, you can add more songs. However, if you find that you're having trouble synchronizing the music with the slide show, you can use a third-party audio editing tool, such as, to string the songs together into one file so they play continuously throughout the slide show. Other related Help articles include: • • • •. To play a song across slides in PowerPoint 2010 • On the Insert tab, select Audio, and then Audio from File. • In the file explorer, locate the music file you want to use and then select Insert. • With the audio icon selected on the slide, on the Playback tab, click the list named Start, and select Play across slides. ( Play across slides also makes the audio file start automatically during a slide show.) Play multiple songs across multiple slides If your slide show is longer than one song, you can add more songs. However, if you find that you're having trouble synchronizing the music with the slide show, you can use a third-party audio editing tool, such as, to string the songs together into one file so they play continuously throughout the slide show. Other related Help articles include: • • • •. You've found the perfect audio clip for your presentation, only to have the sound cut out the second you change slides. This all-too-familiar problem has virtually disappeared with Microsoft PowerPoint 2013, which makes it easier than ever to play sound across multiples slides. All of the tools you'll need can be found right at the top of the screen -- no more finagling and fine-tuning required. Follow this step-by-step tutorial to add sound to your presentation.  
I was asked a question via email by a Macgasm reader on how to play an audio clip across a set of slides within PowerPoint for Mac 2011. I knew it was possible, since I've done the same thing under Office 2007 on the PC. So, I set out to investigate, and I thought I would share my findings. Wait while PowerPoint imports the music file into the presentation. To play the music on two or more slides, select 'Play across slides.' Click 'Insert' at the top left of the screen. Click 'Audio' at the top right of the Ribbon. Click on 'Online Audio' in the drop-down menu. Alternatively, click on 'Audio on My PC' if you want to insert audio saved locally. This opens the Sound dialog box. On the Playback tab: select the appropriate device (here I’m using my Logitech USB headset) click Set Default at the bottom. You should get a green check mark on the device once you’ve set it as default. Repeat step 2 on the. Use your camera & microphone. You can use your camera and microphone for sites in Chrome, like Google Hangouts or Skype. Go to a site that wants to use your microphone and camera. When prompted, choose Allow or Block. If the camera or microphone are not working for Google Hangouts or Google Talk, those apps will need to be given permission to use those resources. The Sound Preference Pane in System Preferences may also need to be set to use the computer's internal microphone. To set the Sound Preference Pane to use the computer's internal microphone: • Click on the gray Apple in the finder menubar, and then select System Preferences from the drop down menu. • Click on the Sound Preference Pane. 
• Click on the Input tab along the top of the window. • From the portion of the window that lists sound input devices, select Internal Microphone. To allow Google Hangouts and/or Google Talk to use the camera and/or microphone: • Open Google Chrome. • Select Chrome-->Preferences. • Scroll to the bottom of the window and select Show Advanced Settings. • In the Privacy section, click on the Content Settings.button. • To enable the Microphone: Scroll down to the Microphone section and select the radio button next to Ask when a site requires access to your microphone (recommended).* • To enable the Camera: Scroll down to the Camera section and select the radio button next to Ask when a site requires access to your camera (recommended).* • Close the Chrome Preferences tab. When a website or app needs access to the camera or microphone, a pop up message will appear to choose to allow or deny access to the resource. Free c++ ide for mac. * For some versions of Chrome, the section may be named Media. The radio buttons in the Media section to enable the microphone and/or camera will be the same as described above. To enable Voice Typing while editing or creating a Google doc: • Open an existing or create a new Google doc. • Position the cursor where you want to begin using Voice Typing. • Select Tools and then Voice Typing. From the menu. • A microphone icon will appear. • Click on the microphone icon to start Voice Typing. The icon will be red while Voice Typing is active. • Speech will be converted to text as you speak. There may a slight delay as the microphone and Google Talk convert the spoken words to text. • Click on the microphone icon to end Voice Typing. • Click on the small 'x' in the upper right of the microphone icon window to exit Voice Typing. Note: Punctuation can be spoken and will convert for 'comma', 'period', 'question mark', 'exclamation point', 'new paragraph', and 'new line'. Home Support Printers All-In-Ones WorkForce Series Epson WorkForce WF-3620. Can I use Epson Scan with my Mac? For Windows or my Mac? Does Epson make drivers. Epson WorkForce WF-3620 driver Windows 10/8/8.1/7/XP/Vista/Mac Latest update 2018 is available for free Download at this page. In General, most people Install Recommended driver because it contains a package of files that are in need. Epson wf-3620 driver for mac. Aug 18, 2010 - On PCs running Microsoft Windows XP or later and Mac OSX 10.6.8 or later. Powerpoint 2008 viewer for mac. How do I uninstall the Qualys BrowserCheck Plug-in? To determine the security status of some plugins (such as Windows Media Player). Flip4Mac from Telestream, Inc. Is a digital media software for the macOS operating system. It is particularly known for being the only QuickTime component for macOS that supports Windows Media Video. Telestream previously offered a free standalone player also known as Flip Player. Windows Media Video 8 (WMV2).  
How to Delete Flash on Mac OS X| How to Remove Flash on Mac OS X With the about Adobe Flash Player's vulnerability, most Mac users are scrambling to find out how to uninstall Flash Player on their Macs. Normally, uninstalling Flash on Mac can cause a bit of a headache. But, with, you can get rid of it in just a few clicks. To uninstall Flash with CleanMyMac 3, just: • and launch it. • Click on Extensions in the left menu. Audio receiver for mac. • Click Preference Panes in the center list and checkmark Flash Player in the subsequent right-center list. • Click Remove at the bottom of the CleanMyMac 3 interface. Uninstalling Flash Player with really just takes only a few clicks. And not only can you remove applications and extensions, but you can also reclaim gigabytes of space by cleaning up junk files on your Mac. CleanMyMac 3 safely scans your system for to remove the excess you just don't need, like foreign language packs (a.k.a localization files). And get yourself a faster, cleaner Mac right now. These might also interest you: • •. I have a little problem (not me, a friend). He bought a 1TB HDD with some service files, including Paragon NTFS 11.3.11 (he bought this HDD with his Mac, which shipped with Mac OS X version 10.10 or 10.11). He has updated his MacBook to 10.12 and Paragon stopped working, so I think this is a version problem. The question is, how can I update this Paragon software for macOS 10.12?

Do I need to buy a new version of this app??? Samsung's services files do not have a serial number, only some Windows apps and Macintosh NTFS Paragon driver (Paragon 11.3). Nov 21, 2015 - Despite its name, the multilingual product supports all OS X versions up to OS X 10.6 Snow Leopard. Paragon NTFS for Mac eliminates. Paragon NTFS for Mac 15 is a great upgrade to an exceptional cross-platform utility that’s easily worth the money, especially if you own the previous version 14, in which case this one’s free. |


 RSS-канал
